Most of this is going to be rather straight forward. Most developers will have done this plenty of times. So why bother writing about it? In my case, there are several things that I tend to do for most projects. I find that, if don’t do these things up front, I’ll usually end up in a place that I’ll need to do it at that time. These steps don’t always need to be done at the start of the project and some projects don’t require every step.
This is an attempt at creating a repeatable process that can work for the majority of projects.
Creating a repository
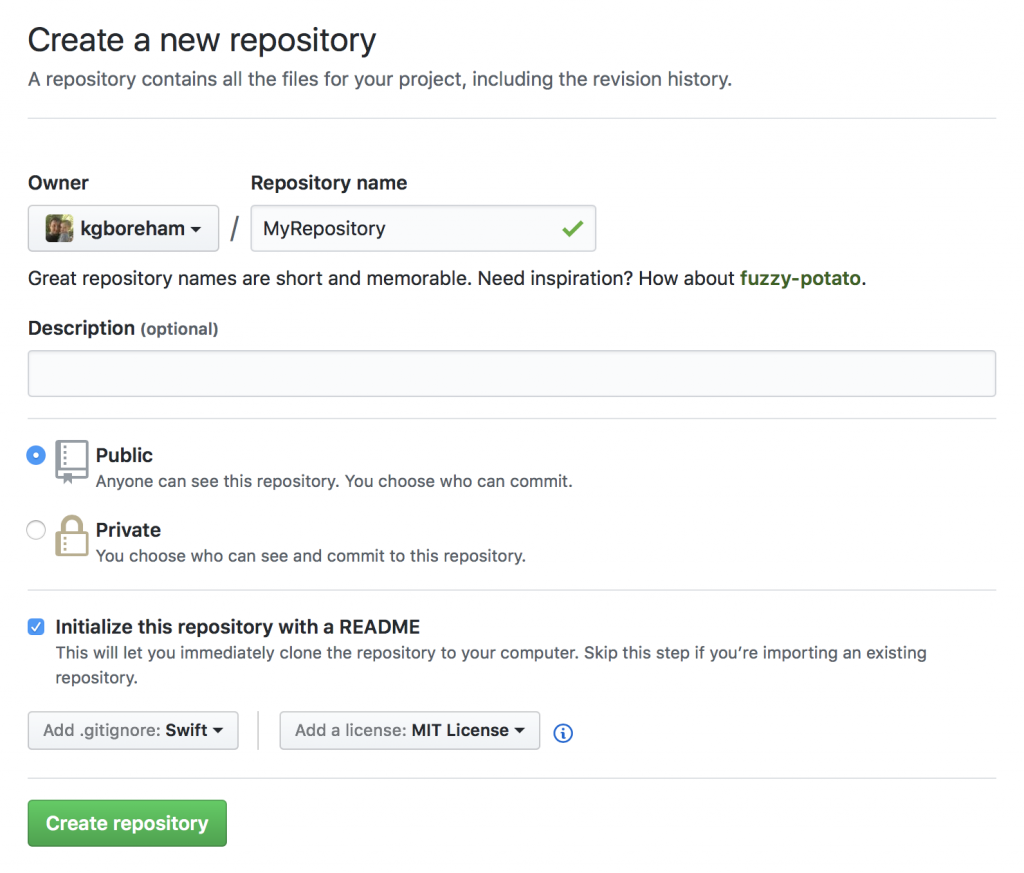
For any serious project, the first thing I like to do is create a repository. For the last several years I’ve used git and will continue using git for the foreseeable future. My favorite host is GitHub.
It’s easy enough to create a local git repository, however GitHub lets me create the repository directly from the site. The really nice thing about their interface is that they can take care of some light setup for you. I find it convenient that I can have GitHub add a README, add a .gitignore that’s common for the language you are working with, and even add a license file if you want.
Creating a new Xcode Project
For this project I’m going to create a new SpriteKit game, however these steps can work for any other application with slight adjustments.
Open Xcode and select Create a new Xcode Project on the welcome screen.

Or using the menu select File > New > Project…
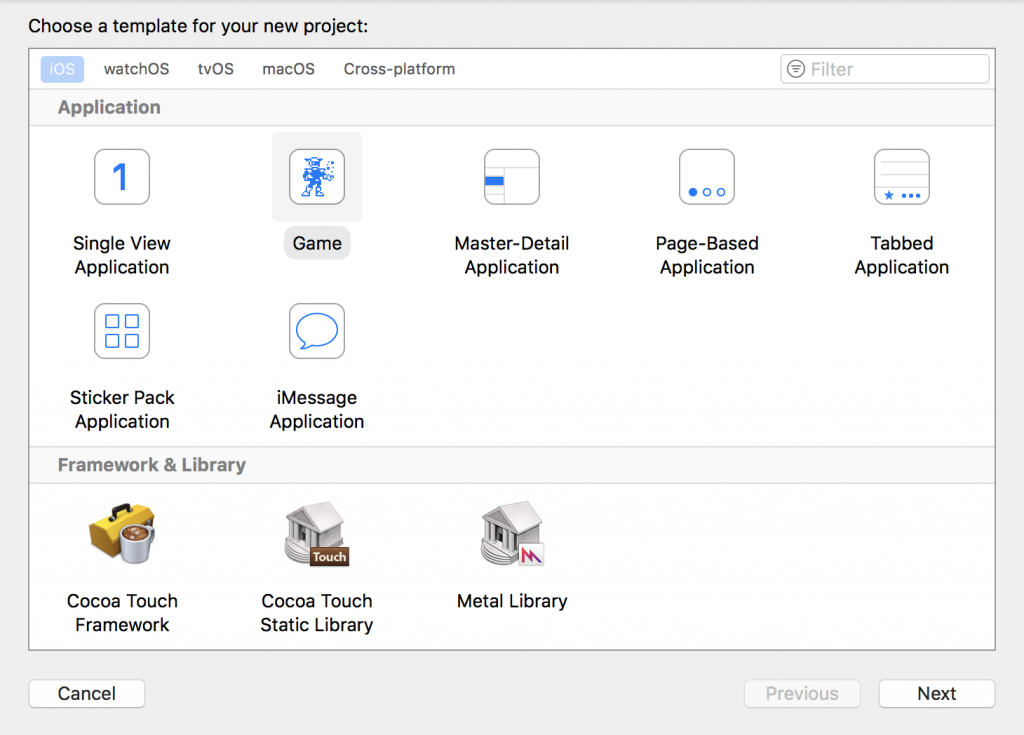
Select the desired OS (usually iOS). Then select Game under the Application section and click Next.
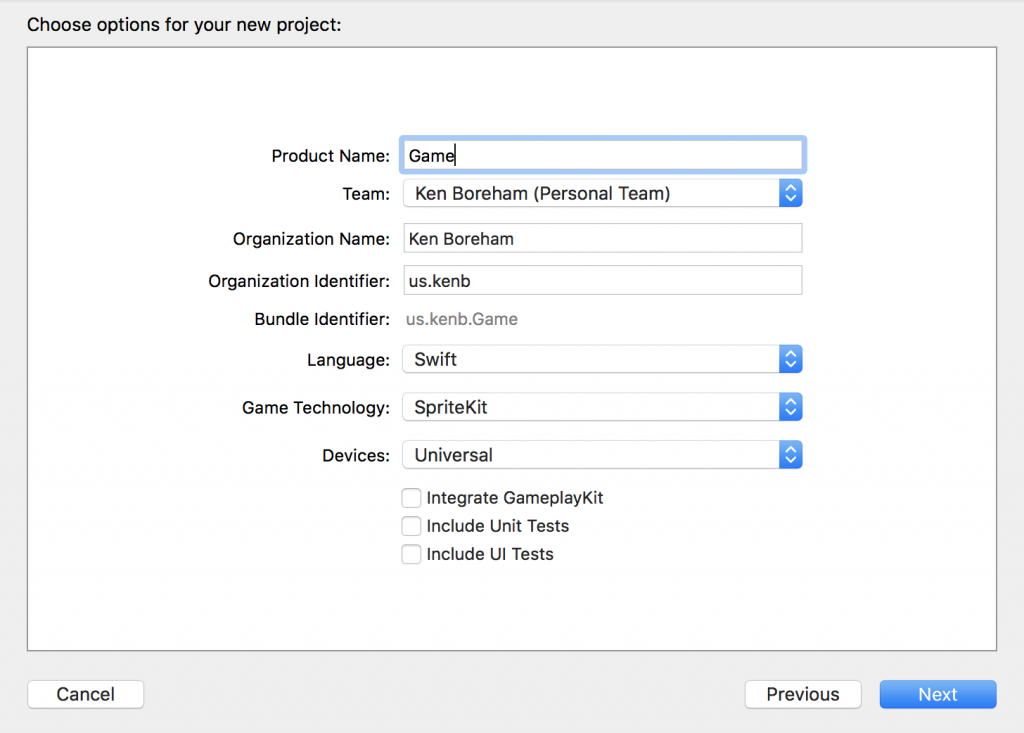
Enter an appropriate Product Name and review the remaining fields. Swift, SpriteKit and Universal are defaults here and that’s exactly what I want. It’s usually a good idea to include Unit Tests and UI Tests as well. Click Next.
Now select a location to save the project.
This is going to create a file structure inside of the location folder that you choose.
- ProjectName
    ProjectName.xcodeproj
    - ProjectName
        source files
    - ProjectNameTests
        test files
    - ProjectNameUITests
        test files
If you have already created a folder and/or repository for the project, you’ll want to set your Project Name to match the folder and select it’s parent as the location.
If you haven’t set up a repository, I recommend selecting the option to do it here.
Click Create
Next you’ll want to configure the project, more on that soon…
Starting a new iOS project
November 19, 2017
Reference
Comments Off on Starting a new iOS project
Ken Boreham
Most of this is going to be rather straight forward. Most developers will have done this plenty of times. So why bother writing about it? In my case, there are several things that I tend to do for most projects. I find that, if don’t do these things up front, I’ll usually end up in a place that I’ll need to do it at that time. These steps don’t always need to be done at the start of the project and some projects don’t require every step.
This is an attempt at creating a repeatable process that can work for the majority of projects.
Creating a repository
For any serious project, the first thing I like to do is create a repository. For the last several years I’ve used git and will continue using git for the foreseeable future. My favorite host is GitHub.
It’s easy enough to create a local git repository, however GitHub lets me create the repository directly from the site. The really nice thing about their interface is that they can take care of some light setup for you. I find it convenient that I can have GitHub add a README, add a .gitignore that’s common for the language you are working with, and even add a license file if you want.
Creating a new Xcode Project
For this project I’m going to create a new SpriteKit game, however these steps can work for any other application with slight adjustments.
Open Xcode and select Create a new Xcode Project on the welcome screen.
Or using the menu select File > New > Project…
Select the desired OS (usually iOS). Then select Game under the Application section and click Next.
Enter an appropriate Product Name and review the remaining fields. Swift, SpriteKit and Universal are defaults here and that’s exactly what I want. It’s usually a good idea to include Unit Tests and UI Tests as well. Click Next.
Now select a location to save the project.
This is going to create a file structure inside of the location folder that you choose.
If you have already created a folder and/or repository for the project, you’ll want to set your Project Name to match the folder and select it’s parent as the location.
If you haven’t set up a repository, I recommend selecting the option to do it here.
Click Create
Next you’ll want to configure the project, more on that soon…
Share this: