UILabel and UITextView both rely on TextKit to render text. So why do they behave differently and how can they work together?
Below is a view with a UILabel (blue) and two UITextViews (red) laid out in IB.
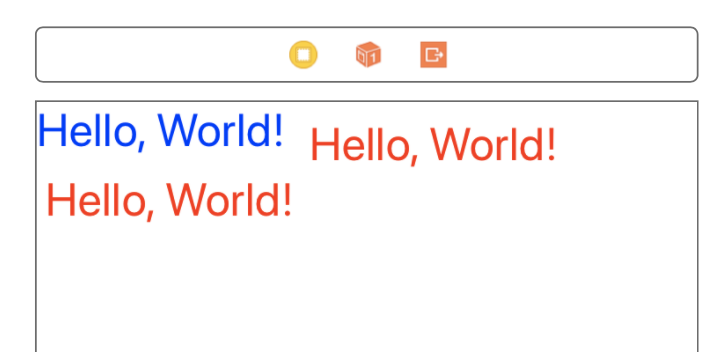
The Label is constrained to the top right corner of the view and uses it’s intrinsic content size to determine the width and height. The size of the label matches closely to the size of the text.
The text view don’t use an intrinsic content size so you have to add constraints that are at least large enough to hold the text. If you set the width and height to that of the label, no text is displayed because that space is not large enough for a text view. Notice the text view to the right is significantly lower that the label, and the text view to the bottom is more to the right. However, these text views are constrained to the top and left respectively. Changing the constrained height and width of the text views also does not change this.
So, why do text views draw text in this larger box? Let’s experiment in a Playground.
import UIKit
import PlaygroundSupport

class MyViewController : UIViewController {
    override func loadView() {
        let view = UIView()
        self.view = view
        view.backgroundColor = .white

        let font = UIFont.systemFont(ofSize: 40)
        let message = "Hello World!"

        let label = createLabel(font: font, message: message)
        view.addSubview(label)
    }

    private func createLabel(font: UIFont, message: String) -> UILabel {
        let label = UILabel()
        label.font = font
        label.text = message
        label.textColor = .blue

        label.sizeToFit()
        label.translatesAutoresizingMaskIntoConstraints = false

        return label
    }
}

PlaygroundPage.current.liveView = MyViewController()
You should see the label in the live view.
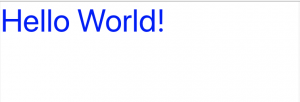
Next let’s add a text view to see how they line up. Add this function to the class.
private func createTextView(font: UIFont, message: String) -> UITextView {
    let textView = UITextView()
    textView.backgroundColor = .clear
    textView.font = font
    textView.text = message
    textView.textColor = .red

    textView.sizeToFit()
    textView.translatesAutoresizingMaskIntoConstraints = false

    return textView
}
The add the view at the bottom of loadView.
let textView = createTextView(font: font, message: message)
view.addSubview(textView)
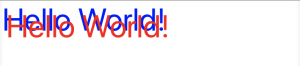
That’s quite a difference!
Let’s make this a little nicer by constraining it to the center of the screen. First, let’s add an extension on UIView to make this a little easier.
extension UIView {
    func constrainCenter(in view: UIView) {
        self.centerXAnchor.constraint(equalTo: view.centerXAnchor).isActive = true
        self.centerYAnchor.constraint(equalTo: view.centerYAnchor).isActive = true
    }
    func constrainSize(_ size: CGSize) {
        self.widthAnchor.constraint(equalToConstant: size.width).isActive = true
        self.heightAnchor.constraint(equalToConstant: size.height).isActive = true
    }
    func constrainEdges(in view: UIView) {
        self.topAnchor.constraint(equalTo: view.topAnchor).isActive = true
        self.bottomAnchor.constraint(equalTo: view.bottomAnchor).isActive = true
        self.leftAnchor.constraint(equalTo: view.leftAnchor).isActive = true
        self.rightAnchor.constraint(equalTo: view.rightAnchor).isActive = true
    }
}
Then add these lines at the end of loadView
label.constrainCenter(in: view)
textView.constrainCenter(in: view)
textView.constrainSize(textView.bounds.size)
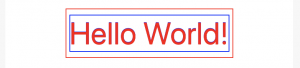
Now the text is aligned. But let’s take a look at the bounding boxes.
Add the following to createLabel before returning.
label.layer.borderWidth = 1
label.layer.borderColor = UIColor.blue.cgColor
Then add similar code in createTextView.
textView.layer.borderWidth = 1
textView.layer.borderColor = UIColor.red.cgColor
Now we can see again that the bounding boxes are not the same.
This might be good enough for some cases, but what if you are trying to be really specific about the size of the contents in your text view.
The most obvious difference between UILabel and UITextView is that the text view is also a scroll view. So we can try setting these properties.
textView.contentInset = .zero
textView.contentInsetAdjustmentBehavior = .never
That doesn’t really change anything in this case. 😩
Text views also give us access to the underlying TextKit objects. TextKit is made up of three main components: Text containers, layout manager, text storage.

Let’s take a look at the text container. It turns out that it has it’s own insets. Insert this line before calling sizeToFit.
textView.textContainerInset = .zero

That took care of the height, but we still have extra width. You really have to know where to look for this one. The text container has a property for line fragment padding. Let’s set that to zero.
textView.textContainer.lineFragmentPadding = 0

That’s what we were looking for! 😀
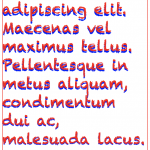
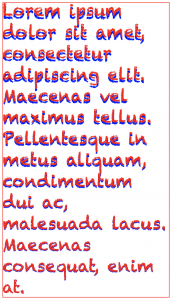
But we’re not quite done yet. Let’s try some longer text. Change the message.
// add to loadView
let message = "Lorem ipsum dolor sit amet, consectetur adipiscing elit. Maecenas vel maximus tellus. Pellentesque in metus aliquam, condimentum dui ac, malesuada lacus. Maecenas consequat, enim at."

// when creating the label
label.preferredMaxLayoutWidth = 300
label.numberOfLines = 0

// replace text constraints with
textView.constrainEdges(in: label)
The text still is still nicely laid out just how we want!
Now let’s try to change the font.
let font = UIFont(name: "chalkduster", size: 30)!
That’s strange, why do different fonts lay out differently? It turns out that UILabel ignores font leading. You can set the text view to behave in the same way through the layout manager.
textView.layoutManager.usesFontLeading = false
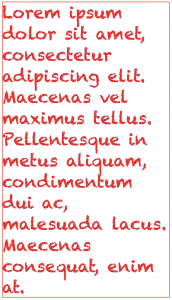
That’s it! We’re finally done.
Here’s the full playground file. LabelVsTextView.playground
How to get UITextView to behave like UILabel
November 20, 2017
Reference, Text, UIKit
Comments Off on How to get UITextView to behave like UILabel
Ken Boreham
UILabel and UITextView both rely on TextKit to render text. So why do they behave differently and how can they work together?
Below is a view with a UILabel (blue) and two UITextViews (red) laid out in IB.
The Label is constrained to the top right corner of the view and uses it’s intrinsic content size to determine the width and height. The size of the label matches closely to the size of the text.
The text view don’t use an intrinsic content size so you have to add constraints that are at least large enough to hold the text. If you set the width and height to that of the label, no text is displayed because that space is not large enough for a text view. Notice the text view to the right is significantly lower that the label, and the text view to the bottom is more to the right. However, these text views are constrained to the top and left respectively. Changing the constrained height and width of the text views also does not change this.
So, why do text views draw text in this larger box? Let’s experiment in a Playground.
You should see the label in the live view.
Next let’s add a text view to see how they line up. Add this function to the class.
The add the view at the bottom of loadView.
That’s quite a difference!
Let’s make this a little nicer by constraining it to the center of the screen. First, let’s add an extension on UIView to make this a little easier.
Then add these lines at the end of loadView
Now the text is aligned. But let’s take a look at the bounding boxes.
Add the following to createLabel before returning.
Then add similar code in createTextView.
Now we can see again that the bounding boxes are not the same.
This might be good enough for some cases, but what if you are trying to be really specific about the size of the contents in your text view.
The most obvious difference between UILabel and UITextView is that the text view is also a scroll view. So we can try setting these properties.
That doesn’t really change anything in this case. 😩
Text views also give us access to the underlying TextKit objects. TextKit is made up of three main components: Text containers, layout manager, text storage.
Let’s take a look at the text container. It turns out that it has it’s own insets. Insert this line before calling sizeToFit.
That took care of the height, but we still have extra width. You really have to know where to look for this one. The text container has a property for line fragment padding. Let’s set that to zero.
That’s what we were looking for! 😀
But we’re not quite done yet. Let’s try some longer text. Change the message.
The text still is still nicely laid out just how we want!
Now let’s try to change the font.
That’s strange, why do different fonts lay out differently? It turns out that UILabel ignores font leading. You can set the text view to behave in the same way through the layout manager.
That’s it! We’re finally done.
Here’s the full playground file. LabelVsTextView.playground
Share this: